Showing posts with label accessories. Show all posts

Wednesday, July 20, 2011

T-Shirt Flower-Puff Hairpin

Another tutorial from me to you! This one is quick and I think it turned out pretty elegant and adds a simple yet artistic touch to your hair. I hope you find my instructions helpful! Enjoy!


Step #1: Gather your materials...

- A T-shirt: old or new, it doesn't matter. It can be scraps too;  you're not going to use too much.

- A cylindrical object such as a bottle of glue or a jar that is about 1.5" in diameter

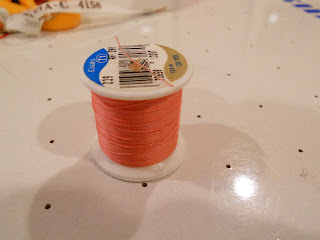
-A cylindrical object such as a spool of thread that is about 1" in diameter (*NOTE* this is not shown in the picture to the right)

-Bobby Pins that match your hair color

-A hot glue gun

-Scissors

 Step #2: Cutting your large circles...

Use your 1.5" in. in diameter cylinder for this step.
Trace the first circle using a pen or pencil.
Cut along the line that you made. These circles do not have to be perfect.
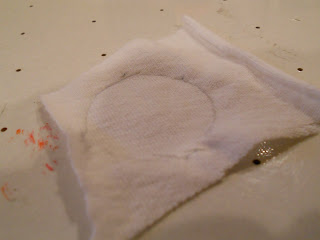
Pin the first circle to a piece of the t-shirt. You can trace if you want but as long as it's pinned, it's not really necessary. 
Cut along the edge of the circle.

Make 10-12 of these circles using the same pin-and-cut method. Remember: you can always make more. Put these aside for now and take out your second cylindrical object and more t-shirt fabric.


Step #3: Cutting the smaller circles... (plug in your hot glue gun now)
 Do the same with these circles as you did for the others.


Make 2 (total) of these circles.
Step #5: Gluing it all together...
 Sandwich one of the circles in a bobby pin. 
 Apply glue on top of and around the bobby pin so that the fabric is secure.
 Once the glue isn't too hot but still squishy, press it down using your finger or something flat.
 Spread glue on the top... and place the second circle on top. Make sure you use as much glue as you need to so that it is strong enough to hold the flower.
 Place the second circle on top and smooth it out so that there aren't any bumps.
 Take out your larger circles....
 Take your circles one at a time and pinch them in the middle and fold them until they look something like the picture above.
 Begin to glue the pieces, good side up, to the small circles.
 Continue until every desired space is filled. If necessary, make more circles to fill empty spots in. It's up to you how full you want your flower to look.

Final Product!


Have a fantastic day!

Tuesday, July 19, 2011

Lace & Chain Bracelet Bangle

Hey, guys! I know I've been gone a very long while, but I'm finally back for another tutorial!


This bangle refashion is simple, yes, but pretty too. Let's get started!

Step #1: Gather your materials!

*Lace trim- I'm not sure exactly how much I used, but it was a lot (maybe a yard or two). It depends on  how thick you want the lace to be. Check the lace to make sure it wraps around your bracelet as many times as you want before you begin your project.

*A bangle- It's best to have a large, over-sized one or else the final product may not fit around your hand.

*A chain or old necklace- It should be about 3 times the circumference as your bangle. I say don't take any risks on having it too small. You can always cut it at the end.

*A hot glue gun

*Scissors

Step #2: Let's begin!

First, you'll need your bangle, your lace trim, and your hot glue gun.


Using your hot glue gun, place a small dot of glue on the spot of the bangle that you'd like to begin. Secure the lace on this spot and wrap it around. Place another dot of glue and continue to wrap the lace around and around the bangle with a dot of glue each time. The lace can be as tight as you'd like. I made mine tight and secure for a more simple look, but you can also make it gathered and loose for a more interesting look.


Continue wrapping until you've come full-circle.
 Once you're done wrapping, cut the lace with scissors or pinking shears.

Secure the lace with a line of hot glue at the very edge of the lace.
And, done! (well, not quite...)

Step #3: Wrapping the chain....


You'll basically do the same for the chain as you did for the lace. No need for instructions, really. You can make the rows of chain as close to one another as you want. Just remember to keep the same amount of space in between each one.


DONE!


On the flowers ;)

Have a great day!

Saturday, July 24, 2010

Summer Stripes Bracelet Tutorial


This is an easy project that I whipped up in just a few minutes. The key is to have your iron out and ready throughout the whole process...


You need:
~Fabric
~Thread
~A sewing machine
~Scissors
~A tape measure
~An Iron

Step #1: Cut your fabric into small strips, 4 inches by random measurements. None should have a bigger width than about 1 1/2 inches. Make some thin and some thick. You can use all different fabrics or you can use a few of the same ones in a pattern.

Step #2: With right sides together, sew 2 strips together.


Step #3: Press the seam open with your iron.


Turn the piece so that the right side is up and iron again, making sure the piece is flat.

Step #4: Repeat steps 2 & 3, adding more and more strips to the piece. Stop when you can wrap the piece around your wrist with a bunch of extra room.


Step #5: Return to your iron and make sure the right side of the piece is facing down.
Fold over the edge of the piece, long ways, and make sure that it is folded over 1 inch.


Fold and iron both sides of the piece.


Step #6: Sew the hem on both sides, using a 1/4" seam allowance.


Step #7: Trim the edges of the hems on the wrong side of the piece.


Step #8: Wrap the piece around your wrist and mark where you want the bracelet to connect. Make sure that you can easily put on and remove the bracelet with that sized bracelet.


Step #9:  Turn the bracelet inside out and sew along the mark you made. Using your iron, press the seam open.


Step #10: Make sure that the bracelet fits, and you're all done!


~Have a great day! Hope you liked this tutorial!~
Related Posts with Thumbnails